I have been slowly decorating my new apartment, mixing the expensive with the more thrifty and was struggling to find a dining room chair that I loved. I found many chairs on First Dibs that fit the bill; the Les Arcs and woven variations, leather sling chairs, etc., but nothing that fit my price range. I decided to make my own and they turned out really well, so here is my how-to if you would like to pick up this project yourself! Each chair cost about $115 including the cost of tools.
Supplies for one chair:
1) IKEA Ivan pine chair
2) Danish Oil in Light Walnut: to stain the frames
3) 21 vegetable leather strips: I bought mine from Weaver Leather and had the strips cut 1.5" wide
4) 100% pure neatsfoot oil: to condition the leather
5) Tools: awl, brass upholstery tacks (9 per chair), hammer, short nails (0.25" long), paintbrush
The first step is to prepare the frame and the leather. For the frame, I brushed on one coat of Danish Oil and laid the pieces out to dry. I did not wipe off the stain. Remember, you don't have to stain the chair seat. I used the chair seat as a tray to hold my stain and oil while I worked.
Weaver ships long leather strips that need to be cut down to size. For the Ivan frame you will need 3 strips cut 24" long each (top of chair, across), 5 strips cut 18" long each (top of chair, vertical), 13 strips cut 22" long each (seat). Once the strips are cut I laid out parchment paper and painted neatsfoot oil on both sides of the strips - it doesn't have to be perfect. The oil conditions the leather.
Now for the fun part..! Beginning with the top of the chair (the hard part!) space and nail down your strips to the FRONT of the chair - 3 across and 5 vertical, nailed to the bottom ladder. I used 3 nails to attach the end of each strip.
Use an awl to make it easier to set your nails
Leather strips nailed to the FRONT of the chair frame
Wrap the leather from the bottom ladder around behind the chair and back up the front and over the top to nail underneath the top ladder. Each leather strip will wrap around the frame to cover the nail-heads. The only nail-heads that will be visible are those on the back of the chair, under the top ladder.
Underneath the top ladder of the chair the nail-heads will not be visible
Prepare for weaving!
Weave across the three horizontal strips, covering the nail-heads and stretch tight around to the back of the frame. Since these will be visible, secure with brass tacks to finish.
The natural leather strips cover nail heads for a clean finish
Use brass tacks to nail final three strips in place
Clean finish with brass tacks
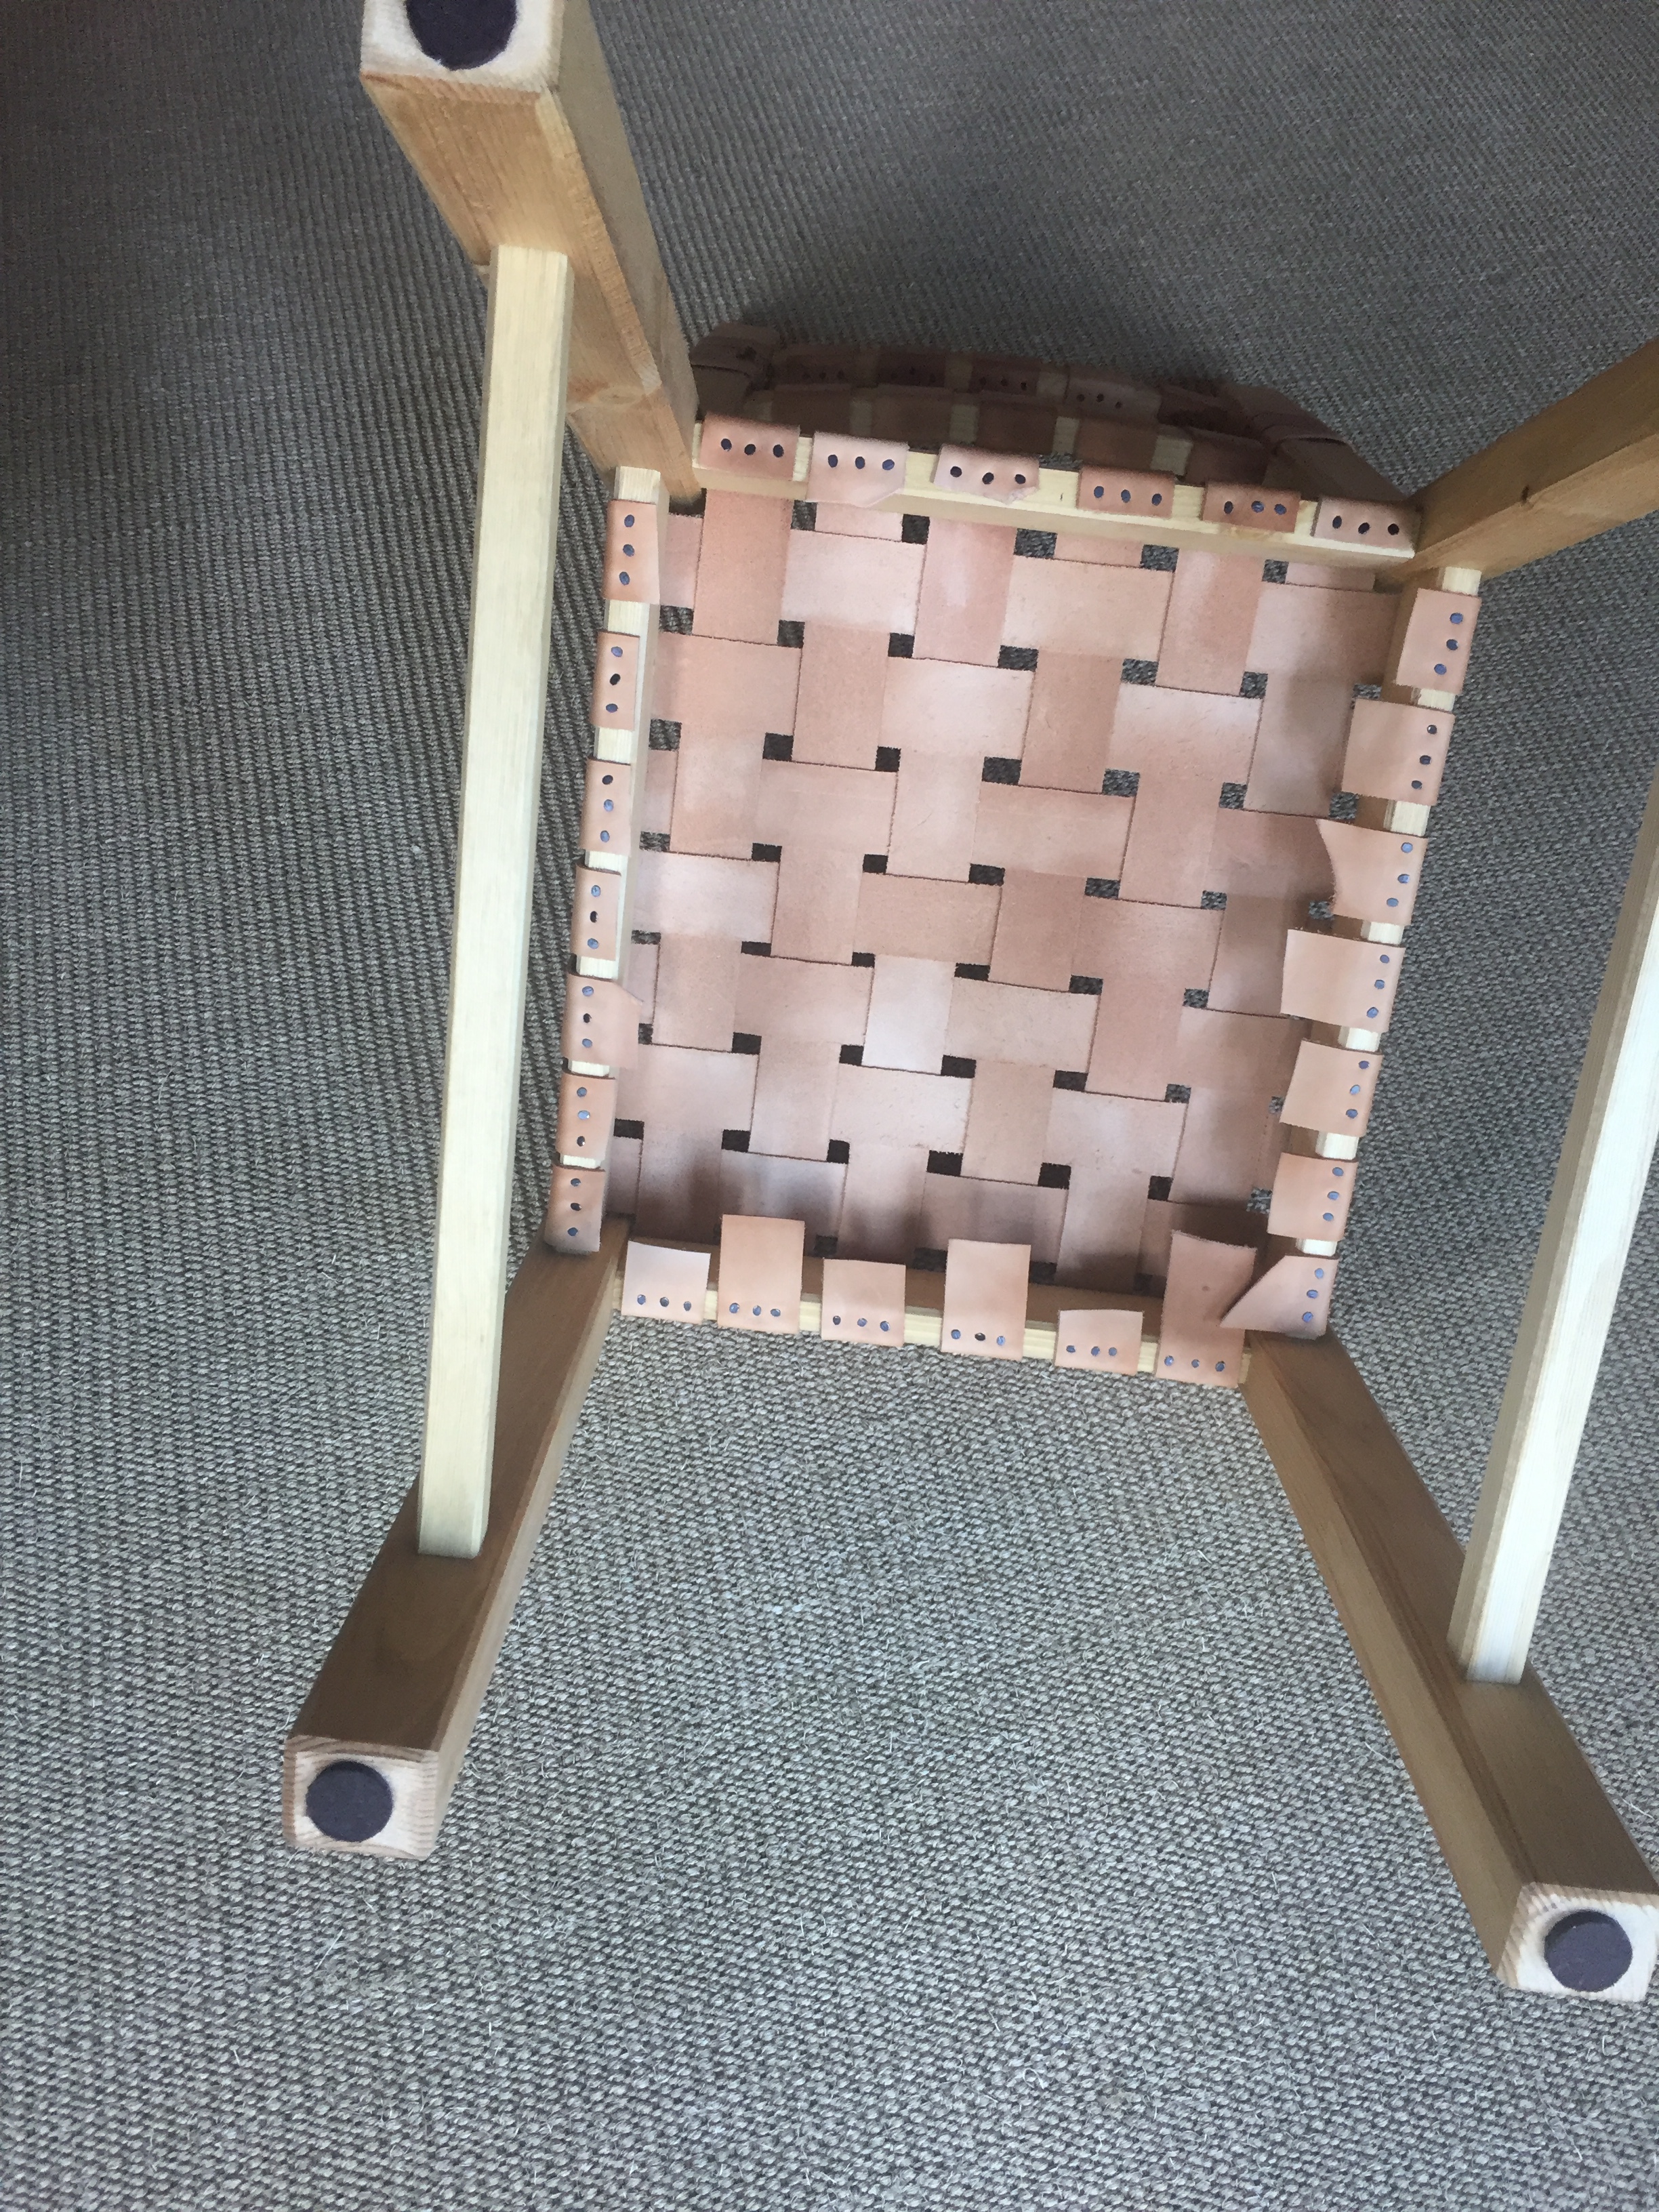
Complete the seat of the chair in a similar fashion, nailing down the strips to the underside of the frame. I used 6 strips across the back and 7 down the side. Resting the chair seat face down on a workbench makes this step easier. I also added felt feet to the chair so they don't scratch my floors.
Woven strips secured to bottom of seat
Please let me know if you have any questions about this project. Hope you enjoyed it!


